Posts tagged Sephora
Trending Topic Tips: Caviar Manicures
Jul 16th
Thanks to Pinterest, nails are having their moment in the sun. The latest advance? Caviar manicures - which are basically bead-topped nail art, designed to give your nails a little added drama and dimension. The back story is that the Creative Director of Ciaté - the company pioneering this trend - wanted a 3D manicure for a magazine cover shoot, and the rest is history. Since we love anything that remotely looks like sparkles, we took on the trend first-hand, and we’re here with some key caviar tips to make you all experts in the manicure field.
Tip #1: READ THE INSTRUCTIONS. While I’m more of a trial and error type of person, my fashionable best friend (who purchased the Caviar Manicure kit) insisted we read the directions, and I begrudgingly admit now that it was the better road to take.
Tip #2: Unless you have an affinity for sparkles and bright colors, go with the neutral black for all occasions or the sleek white for your Miami-themed parties. The rainbow version’s base coat is more “Pepto Pink” than given name “Strawberry Milkshake.”
Tip #3: Use a large, flat surface such as a kitchen island. Many a trendsetter found herself with a lapful of beads after just a small flick of the wrist.
Tip #4: When applying the beads, it’s better to over-pour than to realize only three beads are going to stick, you only have a few seconds before the base coat dries.
Tip #5: Apply a clear top coat to the very edge of your nails only! Should you swipe a top coat on the entire nail, the color will run from the beads and your nail will look like a kindergardener painted them (not that this happened to me or anything).
Tip #6: Allow your nails to dry for at least 20 minutes, unless you want your kitchen floor coated with beads (again, not that this happened to us or anything).
Tip #7: Your nails will feel like there’s some sort of growth on them. Do not be alarmed, especially when you wake up the next morning and forget you’ve caviared them.
Tip #8: The more you wash your hands, the more the color from the beads will run onto the base coat. While this changes the look slightly, when beads fall off it won’t be as noticeable.
Tip #9: While the package says this manicure lasts up to 48 hours, you can stretch it to 72 hours if you don’t mind if the beads start falling off (which starts to happen about 10 minutes after application). That being said…
Tip #10: Reserve this for a special occasion, it’s a good amount of work for just two days at the office.
Check out the photo set above which chronicles our journey with caviar nails, from just applied (upper right-hand corner) to one day after (bottom left-hand corner) to two days after (bottom right-hand corner). Share your caviar manicure success - or horror - stories with us on Facebook at www.facebook.com/STAconsignment!
~Ashley, FashioniSTA
Second Day of Style – Get a Holiday Glow
Dec 22nd
Are you vacationing in Bali this holiday season? Me either. However, if you’d like to fool people into thinking you just got back from an exotic location, or if you just want a little extra color, stay tuned. Today is the second day of style, and it’s all about completing your look by achieving the perfect faux-glow…just in time to take on every end of the year event you’ve got scheduled.
The safest option for tanning is always UV-free, whether it’s a spray, lotion or just an excessive amount of bronzer. (Think you can’t bronzer your entire body? Think again.) If you have the time and the resources, getting a custom airbrush tan is the best way to achieve a flawless glow. This can take a little research, and if you can’t find the right airbrush place, a spray-tanning booth works great too. Before any appointment, make sure to exfoliate and moisturize with a water-based lotion for the best results. I have found that if I have an event, it’s best to get an airbrush tan two days prior or go to a spray tan booth 24 hours before the event.

There’s always the do-it-at-home option, which wins the most convenient category. If you’ve never done it before, it might be a little much to use a self-tanner right away. You can start slow with a gradual tanning lotion, I like L’Oreal Sublime Glow, and go with a shade category slightly darker than your natural color. So if you have fair skin, go with the Medium skin tone option for a better result.
If you’re ready for self-tanner, cream is the way to go over mousse, which can leave you with very little color. I like Clarins Delicious Self Tanning Cream since the bronzing agent in it allows you to see where you’ve already applied it. I’ve found that applying it in straight lines – rather than a circular motion – creates a more even application. You can also try an at-home spray, which usually works best on isolated body parts like your legs unless you happen to have a steady hand and a lot of practice. Sephora has great options for you brave tanners, and enough choices to match any desired skin tone. If you have a willing friend, he or she can be your best secret weapon when spraying yourself, making sure that it’s applied evenly. With the right product, this can also be a great last-minute option. I’ve seen Sally Hansen’s Perfect Legs work a miracle at the eleventh hour, since it’s an instant spray and not one that you have to let sink in.
If you don’t want to deal with sprays or lotions, there are little things you can do to flatter any complexion. Wearing navy or purple hues will complement a fairer skin tone, while sporting something in an orchid shade will actually give you a slightly tanner appearance. You can also apply a subtle amount of bronzer for just a little color boost to your face and shoulders. Take any bronzing brush, blow off any excess bronzer, then sweep it across your face in what I like to call a 3-pattern. Start in the middle of your forehead, and sweep the brush over your brow bone and to your temple, creating a “3” shape over the side of your face. Repeat on the other side and you will look naturally sun-kissed just in time for your event arrival.
Just like the perfect blow-out (which is another post coming soon), a tan is just another finishing touch on top of your perfect party outfit. Let us know what your faux-glow secret is on our Facebook page (www.facebook.com/staconsignment) or sound-off on Twitter (@STAconsignment). Until tomorrow, party fashioniSTAs!
~Ashley, FashioniSTA
8 Days of Style to Celebrate the Season
Dec 21st
In honor of Hanukkah, we at STA bring you the 8 days of style! Each day we will outfit you (hardy har) with a style survival tip to get you through the busy holiday/New Year’s season. From bronzer to bowties, we’ll help you create memorable entrances and festive ensembles people remember even after the New Year’s champagne has worn off.
First Day of Style – Silver Belles
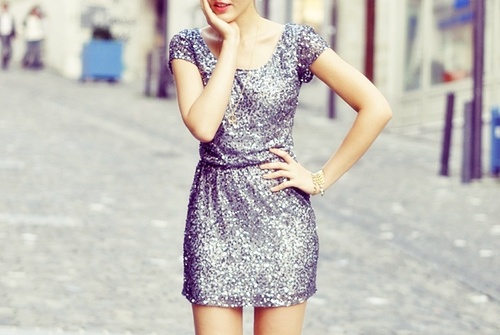
Gold may be the signature metallic of the season, but for a slightly different spin on sparkle, opt for silver this holiday. One of the best things about silver is that you can pair it with bright cranberry for a fresh, festive look, or style it with black for a classic NYE ensemble. A silver dress will always be a refreshing change from the sea of normal holiday red and basic black dresses at events. For an everyday look, pair silver with winter white for a stunning professional palette. Go with a silver skirt and a white cashmere turtleneck, or try a silver blouse with winter white wool pants to channel a stylish ice queen. To try a darker approach, pair darker silver with black for a twist on a classic color scheme.

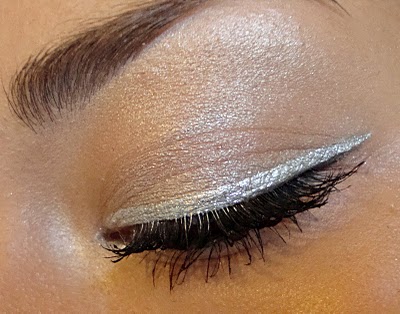
Don’t stop when it comes to makeup either. Using a gray and silver palette, you can create a smoky eye, adding subtle silver sparkle over the lids. If smoky isn’t your thing, colored eyeliner has made a comeback, so grab your silver pencil and go to town. Try top only, bottom only, or both to make your look fashion-forward at your own pace. Should you be completely fearless, go all out with the silver lip trend that has hit the runway. Make sure to add extra gloss on top for a shiny finish so people know it’s high fashion and not hypothermia.
Looking to mix your metals? Weaving together silver and gold is not the fashion taboo it once was, and it’s all about the shades that you have to work with. I’m not a huge fan of mixed metal jewelry because I think the contrast between the two tones tends to be too stark. Start with softer shades of silver and gold, making sure that you’re leaning more towards light slate and champagne tones. Try a few soft gold bangles and alternate them on your arm with lighter silver bracelets. Or cinch a champagne matte dress with a pale silver belt. Stay small to avoid looking like you got dressed in the dark.
You can also use this trend to update your beauty routine. Want to try something just a little different for a night out? Grab a two bottles of round glitter nail polish, like these at Sephora, one in gold and one in silver, and paint your ring finger nails silver and the rest gold. Layer on the coats for full-on glitter and prepare to bring on the holiday sparkle!
Tell us your take on silver on Facebook (www.facebook.com/staconsignment) or Twitter (@STAconsignment). Until tomorrow, fashioniSTAs!
~Ashley, FashioniSTA


